How To Create Google Smart Shopping Campaigns
Setting up Smart Shopping campaigns is fairly straightforward. Let’s take a look at what you’ll need beforehand and go through the process step by step.
Meet basic requirements
Before you dive into creating your campaigns, you’ll need a Merchant Center account linked to your Google Ads account, and a product data feed. Check to make sure that your feed can be updated once a month (30 days) at a minimum.
Google states that you should have at least 20 standard Shopping conversions in the last 45 days. Of course, the more data you have the better. But it’s not a hard requirement, so don’t let that stop you from getting started.
Remember to also:
- Make sure you meet the general requirements for Shopping Campaigns
- Make sure you follow the Shopping Ads Policies
- Make sure you follow the policy on Personalized Advertising (this one is about the remarketing side of Smart Shopping Campaigns).
Recommendations for better performance
You can start your campaign without these, but Google indicates that your spend (and therefore the reach of your ads) might be limited without them.
- Set up conversion tracking: This will track the online purchasing events like signups, purchases from phone calls, and store visits. This is invaluable information and data that will be used to improve your campaigns in the future.
- Dynamic remarketing: There are two pieces of code you can add to your website in order to enable dynamic remarketing: the global site tag and the dynamic remarketing event snippet.
Once someone visits your website you’ll be able to track the specific events which will be used to make personalized remarketing ads. Google provides the specific code needed on their help page as well as how to set these up.
Adding it to your site correctly is really important. However, it’s not as easy as just copying and pasting code to your site. If you don’t feel comfortable adjusting code then it would be best to enlist a programmer for help with this part or contact Google’s tech team to help. During the set-up process, you’ll be able to email the exact code needed to your web developer.
Here are some general requirements:
The global site tag has to be added to every page of your website, and the event snippet can be added to the pages where you want to track what site visitors are doing. For example, this could be on your product pages, shopping carts, or anywhere you want to see how shoppers are interacting with your services.
You can place the event snippet anywhere, but it needs to be below the global site tag. Each business type has its own specific event parameters that should be substituted in the code. You can find them all here to make sure you’re using the right one for your vertical.
Have a remarketing audience
Use remarketing lists and keep adding to them as your campaigns go on. You should have more than 100 active users or visitors within the last 30 days for them to work properly. You won’t need to create a new list if you already have one associated with your Google Ads account. But if not, let’s go over how to add one.
How to create remarketing lists
- Set up an audience source. This is where you collect the information about your users from. In this case, you’ll use the global site tag we talked about previously. When someone visits your site, Google will be alerted to add their cookie ID to your ‘Website visitor’ list.
- Sign into your Google Ads account > tool icon > Shared library
- Go to Audience Manager > Audience lists
- Click the big, blue plus button to add ‘Website visitors’
- Enter a descriptive name and choose a template from the “List members” menu.
- Choose the rules you want to apply to your lists.
- Choose what size you want your list to be (this is the number of visitors in a certain time period). If you’ve already set up remarketing tracking on your site then you can also choose to include visitors from the last 30 days.
- Choose how long you want visitors to stay on your list.
- Create an audience description if you’d like and hit ‘Create audience’.
Have your assets ready to go
Assets are additional pieces of information and images about your business. They’ll be stitched together in different combinations to create ads. This is done by Google automatically. The better individual assets perform, the more they’ll show up. It’s all part of how Google’s machine learning works in order to serve the best performing ads.
Then these ads are shown to people who have gone to your website but haven’t shown signs that they had the intent to buy something. An example of this could be someone who visited your store but didn’t add anything to their shopping cart.
Unlike with Search ads, the way Display ads choose who to show your ads to is based on how they’ve interacted with your website in the past. For example, if a visitor to your site showed a lot of interest in a particular product then that’s most likely what they’re going to be shown from your catalog.
The assets needed include:
Logo
You’ll be good to go if you’ve already uploaded your company’s logo to your Google Merchant Center account.
Images
Upload a marketing image that is a good representation of your business.
- Text is allowed, but should take up less than 20% of the image
- The recommended image size is 1200 x 628 pixels (should at least be bigger than 600 x 314 pixels)
- Needs to have a ratio of 1.91:1 and in landscape
- Maximum file size of 1MB
Text
This text will be used to create ads. You can get inspiration from copy that already performs well on your website. Keep these limits in mind:
Short headlines: 25 characters or less
Long headlines: 90 characters or less
Descriptions: Used for single-product ads and automatically pulled from your copy when there’s room in the ad.
Final URL
Provide the link that shoppers will go to when clicking on your ads.
Video
This is an optional asset that you can add. If you don’t have any promotional video prepared, Google can automatically generate short videos that combine elements of the other assets you’ve uploaded.
Note: Before you start, it’s important to understand that it will probably be close to 45 days before you start seeing results. So, give it some time before you make changes to your campaigns. This is because machine learning is at play, and it needs time to collect data from your products.
How to set up your Smart Shopping campaign in 14 steps
- Sign in to your Google Ads account
- Head over to the ‘Campaigns’ section
- Add a new campaign by clicking the + button and selecting New Campaign
- You’ll see a place to set the goal of your campaign. Choose ‘Sales’ or leave blank. We’ll discuss more about conversion goals below.
- The campaign type should be Shopping.
- Your campaign can only be linked to one Merchant Center account and be sold in just one country. Choose the Merchant Center account that houses the products you’d like to use.
- Select ‘Smart Shopping Campaign’ as the subtype.
- Click ‘Continue’ and choose a name for your campaign.
- Decide what your budget is (more on that later) and set it.
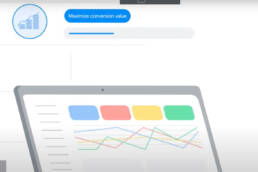
- Choose your bidding type. Google will automatically have it set to maximize your conversions while staying within your average daily budget.
- Do you have a performance goal? Put your desired ROAS here.
- If you’d only like to add some products, choose them here. We recommend adding all your products to give Google more opportunities.
- Add the assets that we talked about previously.
- Preview and save.
Don’t forget about the priority a Google Smart Shopping campaign has over a regular Google Shopping campaign. So if you are advertising the same products via both, Google will choose the ads from the Smart Shopping campaign to display to the potential customers. This is why we advise deactivating the regular campaign to not lose the resources.
Pro tip: You can exclude items in your product feed that you don’t want to include. There are many reasons for wanting to do this, like having out of stock or seasonal items. If you’re using a third-party tool like DataFeedWatch then you can exclude products through feed-based rules.
Related Posts
Event Tracking in Google Analytics / GTM
Event Tracking is one of the most important features in Google Analytics.…

How to Understand Data in the Shopping Campaign Reports
Tools offered by SALESmanago enable you to create a full range of lead…
What Are Google Shopping Smart Campaigns?
Smart Shopping takes machine learning to then next level with Google Shopping.…