
How to Set Up Google Analytics 4 & Use It
What is GA4?
GA4 is built off the backbone of the App + Web platform (aka Firebase). GA4 takes a different approach to data collection and reporting than what you are used to seeing in Universal Analytics (UA).
Google is pushing marketers to re-think how they interpret user data by changing to an ‘event’ based model. Data is collected and presented differently in GA4, as it focuses more on the events and interactions from the user’s journey.
It is also important to note that this will become the new default Google Analytics moving forward as new Google Analytics setups normally* require you to set up GA4 and not UA. Luckily, we can run GA4 parallel with a current UA setup so we can show you how to set this up.
*New UA Property setups are still available. Look for the ‘Show Advanced Options’ link after clicking ‘Create Property.’ You will have the option to create both GA4 and UA or create UA only.
How to Set Up GA4
It’s time to set up GA4 on your Google Analytics account.
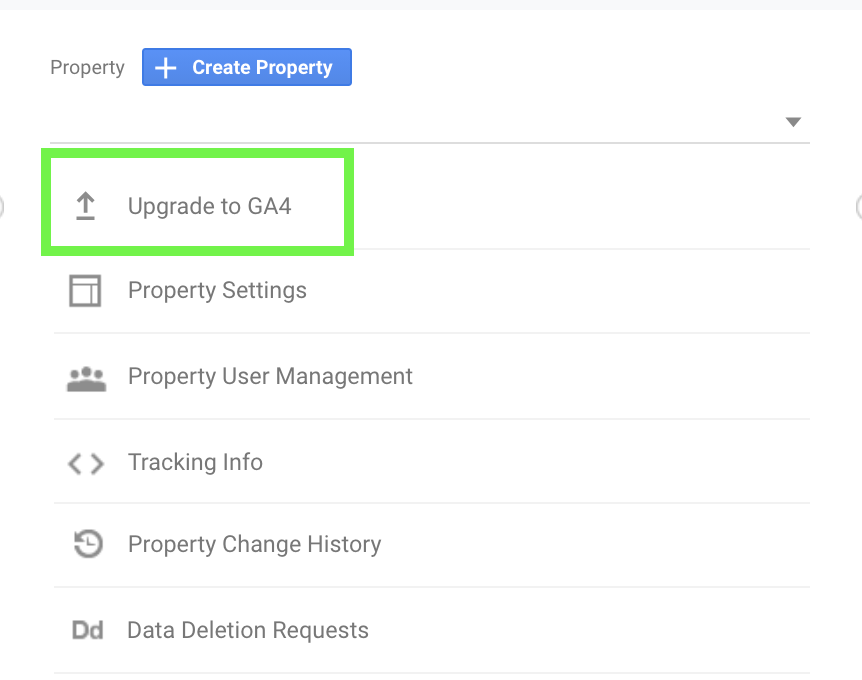
1. Let’s get started by navigating to your Admin Settings within your Google Analytics Account. Under Property Settings, look for the ‘Upgrade to GA4’ link.
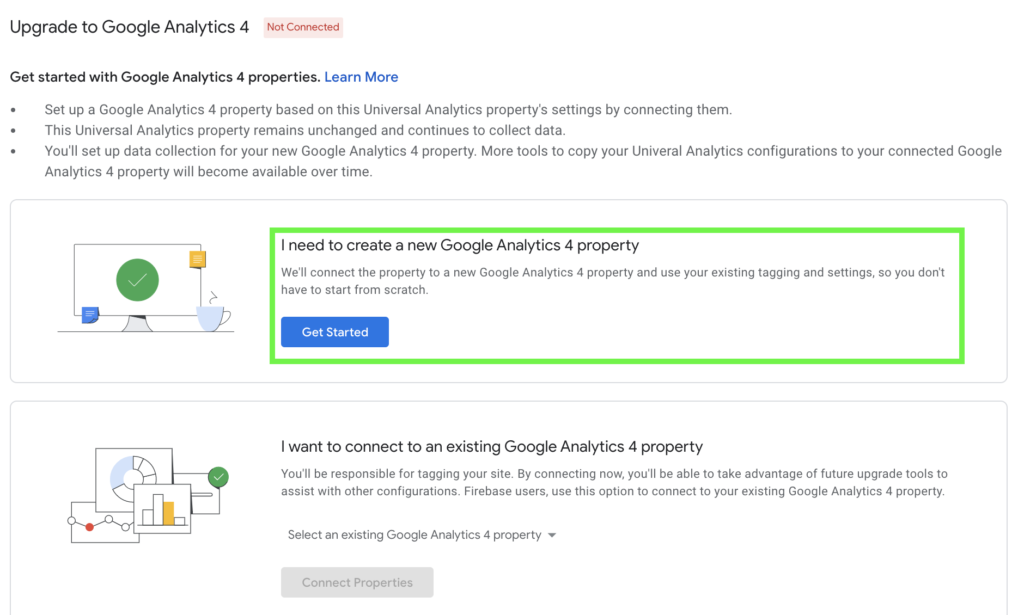
If the upgrade option isn’t available to you, you can click on ‘Create Property’ to create a new GA4 Property and skip ahead to step 4 after following the Create Property setup.
2. Click ‘Get Started’ to begin the setup process with Google Analytics’ setup wizard. Then you’ll have several options depending on your current GA setup. If you are using the Google Site Tag to implement UA, the wizard will be able to enable data collection with your existing tags. If you are not using the Global Site Tag, the following steps will outline how to enable data collection using Google Tag Manager (GTM).
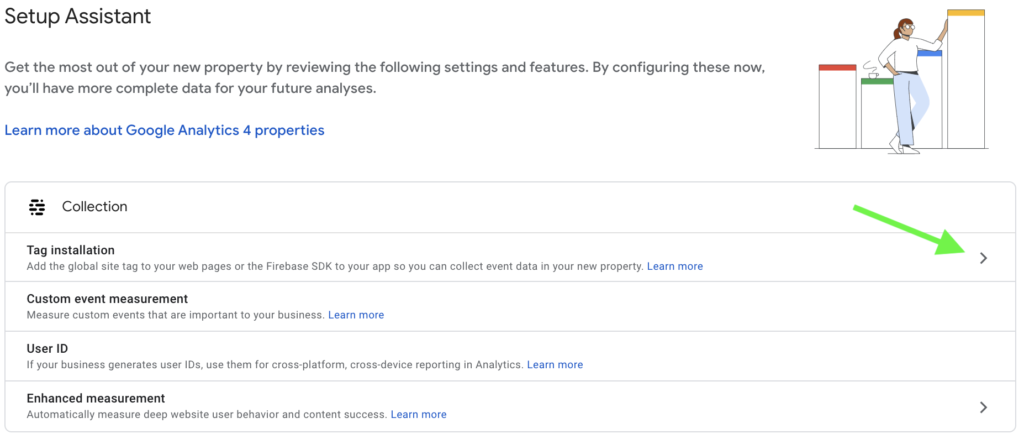
3. In order to start the data collection, we’ll need to generate a Measurement ID for our new GA4 Property. The Measurement ID is similar to the UA ID. Enter the ‘Tag installation’ menu by clicking the right arrow shown below.
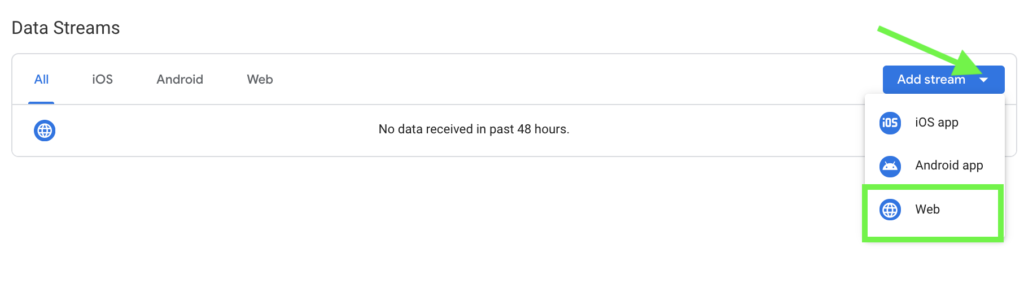
4. GA4 doesn’t have Views like its predecessor. Instead, it has Data Streams. The Data Stream expands beyond the Pageview Request as it measures certain events automatically such as Scrolls, Outbound Link Clicks, Site Search, File Downloads and more. Expand the Add Stream dropdown and select the app to track.
In this example, we’re tracking a website so we’ll select Web.
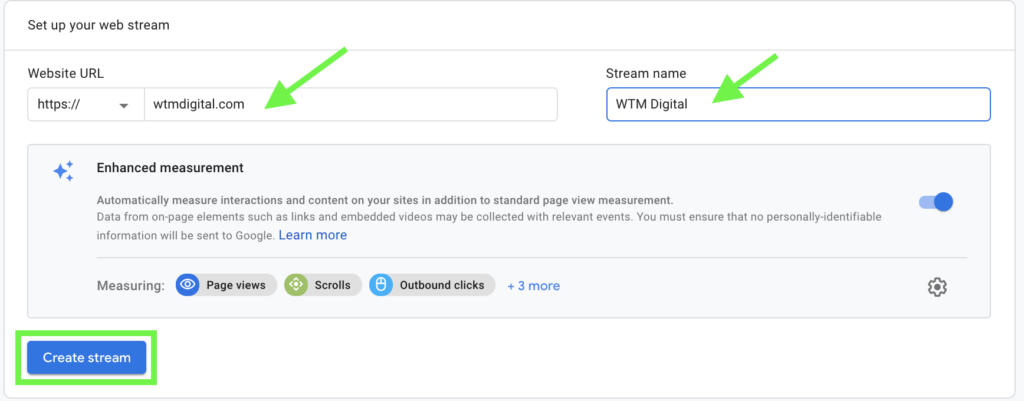
5. Configure your Data Stream by entering your Website URL and Stream name. Click ‘Create Stream’ when finished.
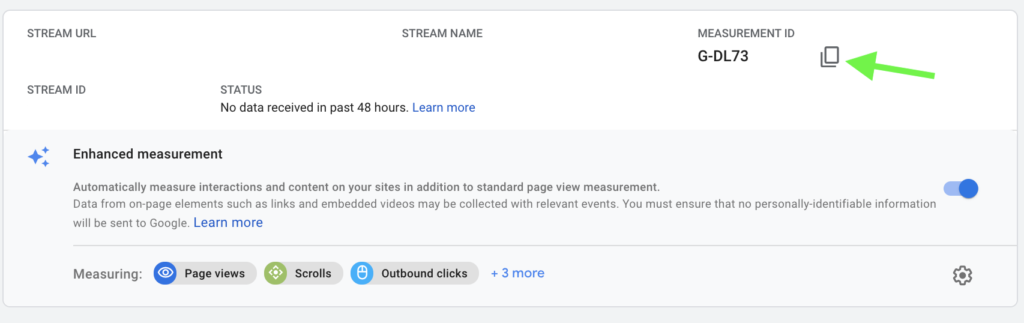
6. Now we have our Measurement ID. Copy or make note of the Measurement ID as it is required for setting up the GA4 Configuration Tag in Google Tag Manager.
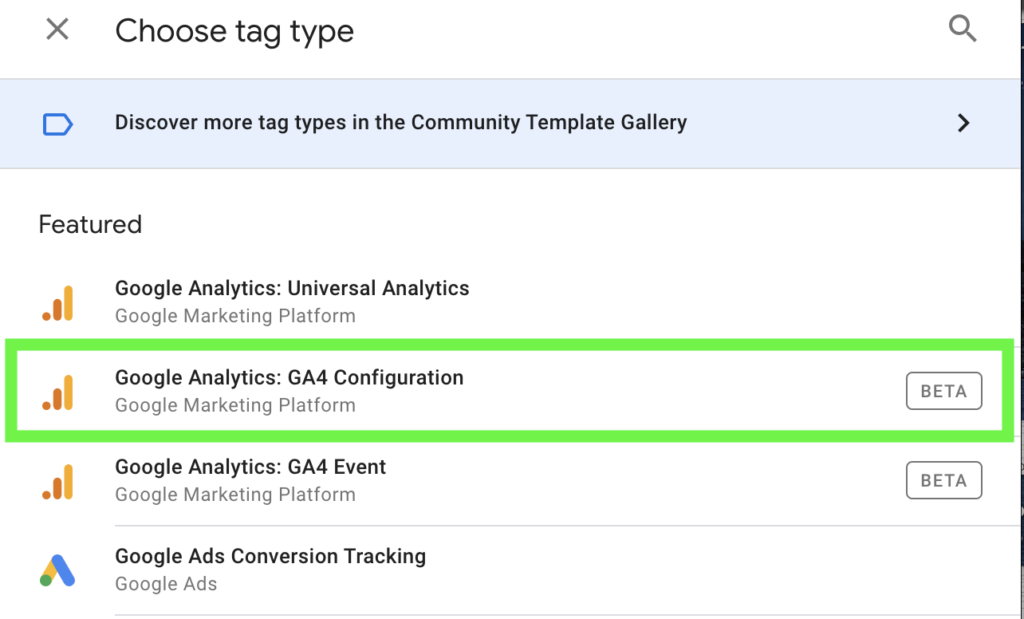
7. Navigate to your Google Tag Manager Dashboard, create a New Tag, Select ‘Tag Configuration,’ and choose ‘Google Analytics: GA4 Configuration’ as the Tag Type.
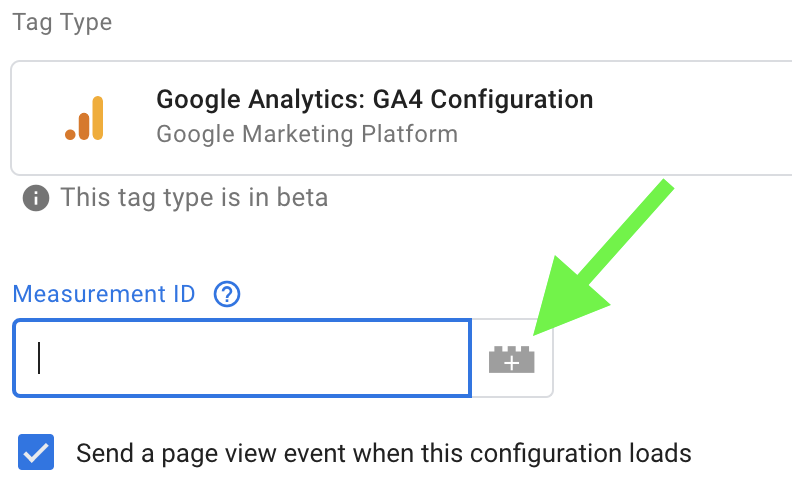
8. Next, we’re going to add the Measurement ID. I recommend creating a Constant Variable for the Measurement ID instead of entering it manually. This will allow you to reference the Measurement ID for other Tags and prevent inconsistencies in the future.
Complete the following steps to create a Constant Variable:
- Click on the Variable icon
- Create a new Variable
- Click the Variable Configuration to populate the Variable Type list
- Select the ‘Constant’ Variable under Utilities
- Enter your GA4 Measurement ID into the Value field and hit Save
9. Now that the Tag is set, configure your Trigger to fire on All Pages and hit Save to complete the GA4 Configuration.
10. You can test your GA4 Tag with Tag Manager’s Preview Mode or you can publish your container to push the new Tag live. Remember to publish your container after testing or your GA4 Property won’t receive data. Once the tag is live, you can view live hits by visiting the GA4 Realtime report. You can also view the published Tag in Google Tag Assistant.
Now that you’ve set up GA4, you can start using it to track users and their actions more effectively.
![]()
Related Posts
Event Tracking in Google Analytics / GTM
Event Tracking is one of the most important features in Google Analytics.…

How to Understand Data in the Shopping Campaign Reports
Tools offered by SALESmanago enable you to create a full range of lead…
Setup Enhanced Ecommerce Events in Google Tag Manager
Enhanced Ecommerce is certainly one of the finest reporting user interface…